
I have been going through my electronic files, and came across instructions for my first paper bag album that I did in 2009! I am a lot better now with paper crafts, than I was then ... but thought it would be fun to share with you...maybe inspire a beginner out there!
List of Supplies
• 3 paper bags (lunch size)
• hole puncher
• Versamark ink pad – black
• Luminaries H20 Twinkling watercolors
• 6 sheets of plain cardstock
• 6 sheets of patterned cardstock
• glue stick or adhesive runner
• paper piercer or large nail
• glass cutting mat
• fiskars paper cutter
• assorted brads
• assorted flower piecing
• assorted ribbon
• small vellum envelope (ATC size)
• 6 blank ATCS
• 6 large paper tags
• black micron marker
• assorted rubber stamp sayings
• assorted rub-ons
• assorted Post It note pads
Basic Step by Step Directions – Assembling Your Book
1.Take your 3 paper bags and stack them with ends alternating.
2.Fold them to form crease line. With bags still folded, along the crease line punch at least 3 holes using a hole puncher.
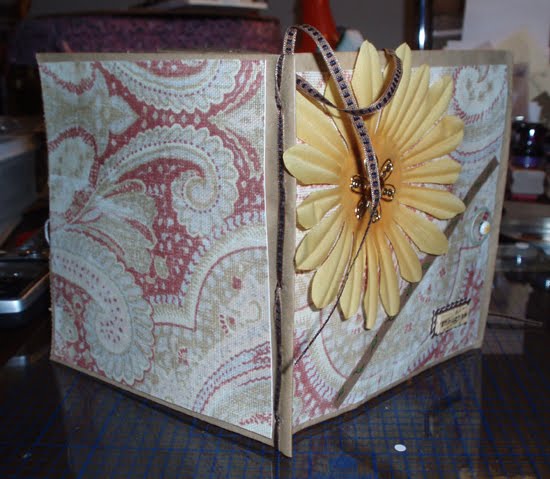
3.At this stage, it is your choice as to how you “bind” your book. You can use either decorative brads or ribbon. I chose to use ribbon.

Basic Step by Step Directions
1.After deciding on a theme for your book, choose your color paper.
2.When you’ve chosen your paper, cut your cardstock down to size of paper bag pages. (I used a Fiskars Paper Cutter.)

3.With your glue stick or adhesive runner, begin to put your selected pieces of cardstock on the pages of your book.

4.I chose to begin with the cover, but you can start with the inside pages and leave the outside pages for last.
NOTE: Follow Steps 3 thru 5 to adhere the initial cardstock sheets to each page, before adding embellishments.
Basic Step by Step Directions – Embellishing Your Pages
1.I chose a large flower, but you can use any embellishment for your cover. For the center of the flower you can add cardstock, buttons, and glitter or jeweled accents. I chose a flowered jewel accent.

2.Since the theme of my book was Thoughts, for the inside of my book, I decided to use Post It notes, blank sheets of stationary and other things that would encourage the recipient to jot down their thoughts and ideas.

The most important thing to remember in assembling your book?- Have fun!! The ideas are limitless as to what you can create using simple supplies and scraps from around the house. You can paint your book, add ATCS & tags (as shown on the Idea Pages) – just use your imagination!
Additional Page Ideas from 2009 (don’t forget to stick goodies in those pockets!)


 Painting For Fun and For Profit
